Thinking about trying out hydroponics but feeling a bit overwhelmed? You’re not alone. Lots of people think it’s complicated, but honestly, it doesn’t have to be. We’re going to walk through how to get a Kratky method setup going, step by step. It’s a super simple way to grow plants right at home, and you don’t need a ton of fancy gear to get started. So, grab a drink, and let’s figure out this Kratky method setup together.
Key Takeaways
- The Kratky method is a simple, passive hydroponic system that doesn’t need pumps or electricity.
- It works by creating an air gap for roots as the water level drops, providing oxygen.
- You can use common household items for your Kratky method setup, making it budget-friendly.
- While often ‘set it and forget it,’ monitoring is needed, especially for larger plants or longer growth cycles.
- Keeping your container covered is important to prevent pests and algae, and to manage the environment.
Understanding The Kratky Method Basics
So, you’re curious about the Kratky method for growing plants without soil? It’s a pretty neat way to do hydroponics, and honestly, it’s one of the simplest ways to get started. Think of it as a hands-off approach to growing your own food, especially if you’re into leafy greens or herbs. The whole idea comes from a guy named Bernard Kratky, who figured out a way to grow plants using just nutrient-rich water and a container.
What Is The Kratky Method?
The Kratky method is a type of hydroponics, which means growing plants without soil. What makes it special is that it’s a completely passive system. This means no pumps, no electricity, and no complicated setups are needed. You fill a container with a special nutrient solution, place your plant in a way that its roots can reach the water, and that’s pretty much it. The plant takes what it needs, and as the water level drops, the roots get more air, which they also need to grow. It’s often called a ‘set it and forget it’ method, though we’ll get into the nuances of that later.
How Does The Kratky Method Work?
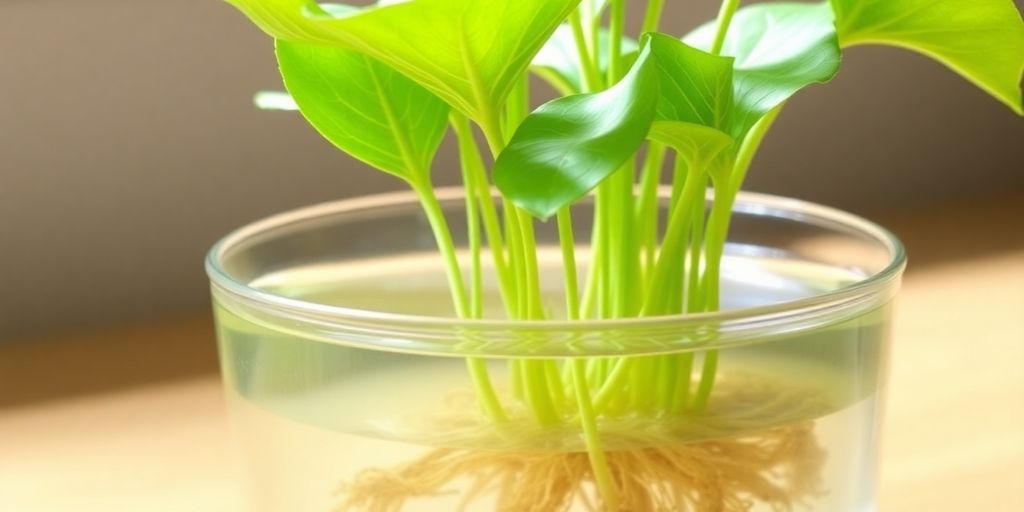
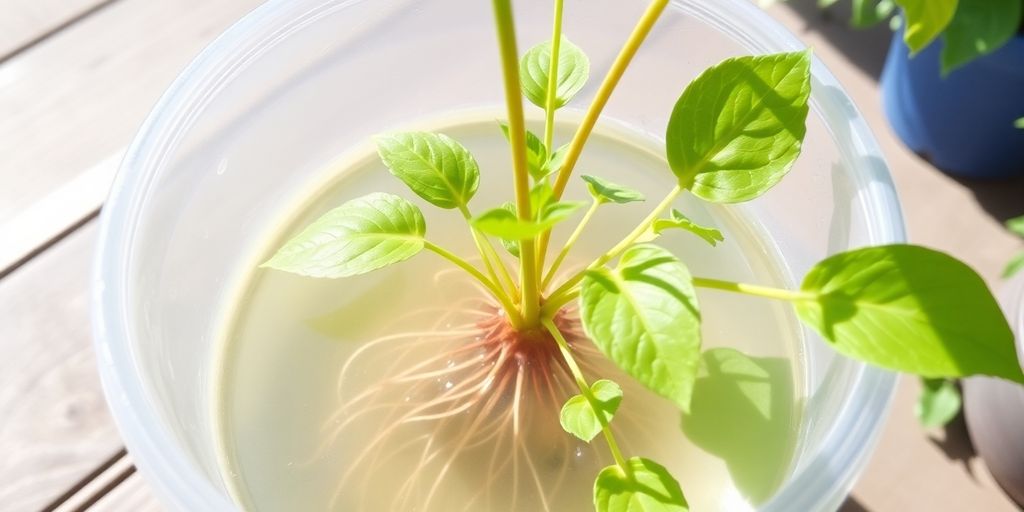
It’s all about how the roots interact with the water and air. When you first set up your Kratky system, the roots are submerged in the nutrient solution. As the plant grows and drinks the water, the water level goes down. This creates an air gap between the water surface and the bottom of the container. This air gap is super important because it allows the upper part of the roots to get oxygen. Without this air gap, the roots would essentially drown. So, the plant gets water and nutrients from below, and air from above, all within the same container. It’s a clever, self-regulating system.
Benefits Of The Kratky Method
Why choose Kratky? Well, for starters, it’s incredibly easy to set up and maintain, making it perfect for beginners. You don’t need to buy pumps or worry about electricity, which also means lower costs. Plus, it’s a quiet system, so no noisy equipment. It’s also quite adaptable; you can use recycled containers, making it an eco-friendly option too.
Here are some of the main advantages:
- Simplicity: Minimal parts and no moving components.
- Low Cost: No need for pumps, electricity, or complex equipment.
- Low Maintenance: Once set up, it requires very little intervention.
- Space Saving: Great for small spaces like apartments or balconies.
- Water Efficiency: Plants only take what they need, reducing waste.
While it’s often called ‘set and forget,’ successful Kratky growing does involve understanding a few key principles, especially regarding nutrient levels and root oxygenation. It’s not entirely hands-off, but it’s close!
Gathering Your Kratky Method Setup Supplies
Alright, let’s get down to business with the supplies you’ll need for your Kratky setup. Think of this as your shopping list for a super simple, no-fuss hydroponic garden. The beauty of Kratky is that you don’t need a lot of fancy gear, which is great for beginners. We’re aiming for ease and effectiveness here.
Essential Container Choices
First up, you need a container to hold your nutrient solution. This is basically your plant’s water tank. You can use almost anything, really. Many people repurpose things they already have, like old food-grade buckets or even large plastic jugs. For smaller plants like herbs or lettuce, a gallon jug or even a wide-mouth mason jar can work just fine. If you’re planning on growing something a bit bigger, or just want a larger reservoir, a 5-gallon bucket is a popular choice. It’s a good idea to go with an opaque container to block out light, which helps prevent algae from growing in your nutrient solution. If your container isn’t opaque, you can always paint it black or wrap it in something dark.
Selecting Net Pots and Growing Medium
Next, you’ll need net pots. These are the little plastic baskets that hold your plant and its growing medium, with holes in the bottom so the roots can reach down into the water. They come in various sizes, but 3-inch net pots are pretty standard and work well for most common plants. As for the growing medium, this is what supports your seedling in the net pot. Popular choices include Rockwool cubes, coco coir, or clay pebbles (like Hydroton). These materials provide support and allow for good air circulation around the roots. You’ll want to make sure your chosen medium is inert, meaning it doesn’t add or take away nutrients from your solution.
Choosing the Right Nutrient Solution
This is where the magic happens – feeding your plants! You can’t just use plain water; plants need nutrients to grow. For hydroponics, you’ll want to get a hydroponic-specific nutrient solution. These usually come in a multi-part system (like a ‘Grow’, ‘Micro’, and ‘Bloom’ formula, though for leafy greens you might only need a ‘Grow’ and ‘Micro’). It’s important to follow the mixing instructions on the packaging carefully. You’ll also need a way to measure the pH of your solution, as plants can only absorb nutrients within a certain pH range. A simple pH testing kit or a digital pH meter will do the trick. You might also need pH Up or pH Down solutions to adjust the levels if they’re off. Getting the nutrient mix and pH right from the start makes a big difference. You can find good starter nutrient kits online, like the ones used for basic hydroponic setups.
Preparing Your Kratky System Components
Now that you’ve got your supplies, it’s time to get them ready for action. This part is all about making sure everything fits together and is set up for your plants to thrive. It’s not super complicated, but doing it right makes a big difference.
Modifying The Container Lid
Your container lid is like the plant’s little balcony, holding it up and keeping things tidy. You’ll need to make holes in it for your net pots. The size of the hole should match your net pots so they sit snugly without falling through. A hole saw attachment for a drill works great for this, giving you a clean, round opening. If you don’t have a drill, a sharp utility knife can work for softer plastic lids, but be extra careful. The goal is a secure fit for each net pot.
Preparing The Growing Medium
The growing medium, like clay pebbles or rockwool, is what supports your seedling’s roots and helps them get air. If you’re using clay pebbles (often called Hydroton), give them a good rinse first. They can be a bit dusty from manufacturing. Rockwool cubes usually come pre-moistened, but it’s a good idea to soak them in pH-adjusted water for a bit before use. This helps them hold moisture and makes them ready for your seeds or seedlings. It’s important to get this right so the roots have a good start.
Germinating Your Seeds
While your container lid is getting its holes, you can start germinating your seeds. Many people like to start seeds in small rockwool cubes or peat pellets. Just follow the instructions on the seed packet or your chosen germination medium. Keep them moist and warm until you see the first little roots poking out. This usually takes a few days. Starting seeds separately gives you more control and ensures you’re transplanting healthy seedlings. You can find good germination kits online if you don’t have any supplies handy.
| Germination Stage | Conditions Needed |
|---|---|
| Seed | Warm, moist |
| Sprout | Light, moisture |
| Seedling | Light, nutrients |
Mixing And Managing Nutrient Solutions
Alright, let’s talk about getting the nutrient solution just right for your Kratky setup. This is where the magic happens, making sure your plants get exactly what they need to thrive without all the fuss of pumps and timers.
Calculating Nutrient Ratios
So, you’ve got your water, and now you need to add the plant food. Most hydroponic nutrients come in a few parts, usually labeled A, B, and sometimes a Cal-Mag supplement. You’ll want to follow the instructions on the packaging very carefully. Mixing them in the wrong order can sometimes cause nutrients to lock out, meaning the plants can’t absorb them. It’s a good idea to mix each part into a small amount of water separately before adding it to your main reservoir. This helps everything dissolve properly. For leafy greens like lettuce, a balanced mix is usually good, but if you’re growing something like celery, it needs a bit more nitrogen. You can check out guides for specific plants, like this info on Kratky-grown celery.
Achieving Optimal pH Levels
This is super important. Plants can only absorb nutrients when the water is within a certain pH range. For most leafy greens and herbs in a Kratky system, you’re aiming for a pH between 5.5 and 6.5. Your tap water might be higher or lower than this, so you’ll likely need a pH testing kit and some pH Up or pH Down solutions. You’ll add your nutrients, stir it all up, and then test the pH. If it’s too high, add a tiny bit of pH Down, stir, wait a bit, and test again. If it’s too low, use pH Up. It’s a bit of a dance, but getting it right means your plants can actually use the food you’re giving them.
Monitoring Nutrient Strength
While the Kratky method is pretty hands-off, it’s not completely set-and-forget, especially if you’re growing larger plants or plan to keep them for a long time. You’ll want to keep an eye on the nutrient strength, often measured in EC (Electrical Conductivity) or PPM (Parts Per Million). A simple EC or PPM meter is a handy tool for this. For most leafy greens, an EC of around 1.2 to 2.0 mS/cm is a good starting point. As the plants drink the water, the nutrient concentration can change. If you’re growing something that needs a lot of food, you might need to top up the water level with plain water to keep the concentration from getting too high, or add a bit more nutrient solution if it gets too low. It really depends on the plant and how big your container is. For simple setups with lettuce, you might not need to do anything at all until harvest time.
Assembling Your Kratky Method Garden
Now that you have all your components prepped and your nutrient solution mixed, it’s time to put everything together. This is where your garden starts to take shape!
Planting Seedlings In Net Pots
First, gently take your germinated seedlings and place them into the net pots. If you’re using rockwool cubes, they usually fit right into the net pot. Make sure the seedling is stable. You want the base of the seedling to be supported by the growing medium, but not buried too deep. The idea is to have the roots hanging down, ready to reach the water. It’s a delicate step, so handle those little plants with care!
Positioning Plants In The Container
Next, place the net pots into the holes you made in the container lid. The net pot should sit snugly in the hole, with the top rim of the pot resting on the lid. The most important thing here is to ensure there’s a gap between the bottom of the net pot and the water level. This air gap is what gives your plant’s roots access to oxygen, which is super important for healthy growth. For leafy greens like lettuce, a 3-inch net pot is usually perfect. You can find a good selection of hydroponic supplies online.
Initial Water Level Considerations
When you first set up your Kratky system, you’ll fill the container with your nutrient solution. The key is to fill it just high enough so that the bottom of the growing medium (like your rockwool cube or hydroton) is submerged. This allows the seedling to wick up moisture and start growing. As the plant grows and its roots extend downwards, the water level will naturally drop, creating that vital air gap for root oxygenation. For short-cycle plants like lettuce, you might not need to refill at all. However, for larger plants, you’ll need to keep an eye on the water level and top it up as needed, always maintaining that air gap. It’s a simple system, but getting this initial water level right is key to success.
Ongoing Care For Your Kratky Setup
So, you’ve got your Kratky system all set up and looking good. That’s awesome! But the work isn’t totally done yet. Even though the Kratky method is pretty hands-off, there are still a few things you’ll want to keep an eye on to make sure your plants are happy and healthy. It’s not like you have to constantly fiddle with it, but a little attention goes a long way.
Understanding Root Oxygenation
This is a big one for Kratky. Remember how we only filled the container partway? That’s so the roots can get air. As the water level drops, an air gap forms, and that’s where the roots breathe. If the roots are completely submerged all the time, they can’t get oxygen and will eventually rot. You want to see that air gap develop. The key is to let the water level drop naturally as the plant drinks it. If you top it up too much, you’ll lose that vital air space. For smaller plants like lettuce, you might not need to add any water at all during their whole life cycle, which is pretty neat.
Adjusting For Plant Growth Stages
Plants change as they grow, and their needs change too. Young seedlings don’t need as much food as a big, leafy plant that’s about to produce fruit. While the Kratky method is designed for minimal intervention, you might need to adjust things slightly, especially with larger or longer-living plants. For example, if you’re growing something like tomatoes, you’ll definitely need to monitor the nutrient solution more closely than you would for a head of lettuce. You might need to top up the water or even mix a slightly different nutrient solution as the plant gets bigger and starts to flower or fruit. It’s not a set-it-and-forget-it system for every single plant type, but it’s still way easier than soil gardening.
Protecting Against Pests and Algae
Your Kratky setup can sometimes attract unwanted guests. Since the container is open at the top (where the plant comes out), things like mosquitoes might see it as a nice place to lay eggs. Keeping a good lid on your container is the first line of defense. Also, algae can be a problem. Algae love light and nutrients, just like your plants. If you see green stuff growing in your water, it’s algae. It competes with your plants for nutrients and can lower the oxygen levels. Using opaque containers helps a lot, as it blocks light from reaching the nutrient solution. If you do notice algae, you might need to clean out the container and start fresh with new nutrient solution, or at least try to block out any light that’s getting in. Keeping the environment around your plants clean also helps. Good air circulation is also helpful, and maintaining ideal growing temperatures can prevent some issues.
It’s easy to think of Kratky as completely passive, but a little observation can prevent bigger problems down the line. Just check in on your plants every few days to see how the water level is doing and if there’s anything unusual happening.
Wrapping Up Your Kratky Journey
So there you have it! Setting up your own Kratky garden is really pretty straightforward. You don’t need a lot of fancy stuff or a degree in science to get started. We’ve gone over the basics, from picking out your container to mixing the nutrients. It’s a super simple way to grow some greens or herbs right at home, even if you don’t have a lot of space. Give it a try, and you might be surprised at how easy it is to grow your own food. Happy growing!
Frequently Asked Questions
What exactly is the Kratky method?
The Kratky method is a super simple way to grow plants using only water and nutrients, no pumps or electricity needed! Think of it like a plant’s personal drink box. You put the plant in a special pot that sits in a container filled with nutrient-rich water. As the plant drinks, the water level goes down, creating space for air to reach the roots. It’s really a ‘set it and forget it’ kind of deal for many plants.
What kinds of plants grow best with the Kratky method?
You can grow lots of leafy greens and herbs like lettuce, spinach, and basil really easily with Kratky. You can also try growing bigger plants like tomatoes or peppers, but you’ll need a bigger container and might need to keep a closer eye on the water level to make sure the roots get enough air and water.
Why is the Kratky method so popular for beginners?
The biggest advantage is how easy and cheap it is! You don’t need any fancy equipment or electricity. It’s perfect for beginners or anyone who wants a low-maintenance way to grow plants. Plus, you can even use recycled containers, which is great for the environment.
How do the plant roots get air in the Kratky system?
The magic happens as the plant drinks the water. The water level drops, leaving an air gap. This air gap is super important because plant roots need oxygen to breathe and grow strong. So, the Kratky system naturally provides this air supply without any extra equipment.
Do I ever need to add more water or nutrients?
For small plants like lettuce, you often don’t need to do anything after you set it up. The container is sized so that as the plant drinks, the air gap is created perfectly. For bigger plants, you might need to add a bit more water and nutrients if they drink it all up before they’re ready to harvest, but it’s still much simpler than other methods.
Are there any special things I should do to keep my Kratky system healthy?
It’s a good idea to use a container that blocks light, like a dark-colored bucket or a painted jar. This stops yucky stuff like algae from growing in the water, which can harm your plants. Also, make sure your lid fits snugly to keep pests out and the water from drying out too quickly.