So, you’re thinking about growing your own mushrooms at home? It’s actually not as complicated as it sounds. Whether you’re looking at the classic PF Tek method or the more modern monotub approach, getting started is pretty straightforward. We’re going to break down how to do both, covering everything from setting up your gear to knowing when those little fungi are ready to pick. It’s a cool hobby, and honestly, pretty rewarding when you see your first harvest. Let’s get those mushrooms growing!
Key Takeaways
- The PF Tek is a well-known, beginner-friendly method for home mushroom cultivation, using materials like brown rice flour and vermiculite.
- Monotubs offer a simple, cost-effective way to grow mushrooms in bulk, providing a controlled environment that helps maintain humidity and airflow.
- Both PF Tek and monotubs have their own advantages; PF Tek is great for smaller grows, while monotubs excel at producing larger yields.
- Successful home mushroom cultivation relies on maintaining sterile conditions during preparation and inoculation, and controlling humidity, temperature, and air exchange during growth.
- Troubleshooting common issues like contamination or slow growth is part of the learning process, but by following best practices, you can achieve successful harvests.
Understanding The PF Tek Method
The PF Tek, short for Psilocybe Fanaticus Technique, is a foundational method for home mushroom growers. Developed back in the late 20th century, it really opened the door for people to grow their own mushrooms without needing a fancy lab. It’s known for being pretty straightforward, especially for beginners, and uses common household items. Think of it as the entry-level course in mycology – accessible and effective.
What is the PF Tek?
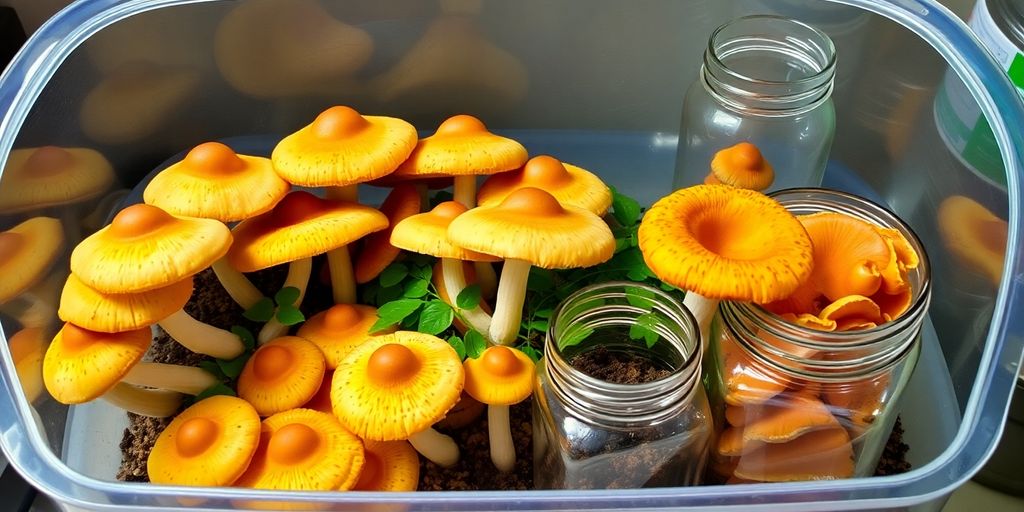
The PF Tek is a cultivation method primarily using brown rice flour (BRF) and vermiculite as the substrate, packed into jars. These jars are then sterilized and inoculated with mushroom spores or liquid culture. The mycelium, the vegetative part of the fungus, grows throughout the substrate, forming what are commonly called ‘cakes’. Once fully colonized, these cakes are removed from the jars and placed in a humid environment to fruit, meaning they produce mushrooms. It’s a simple, yet effective way to get started with growing various mushroom species, particularly Psilocybe cubensis.
Origins and Evolution of PF Tek
This technique was popularized by Robert McPherson, known online as Psilocybe Fanaticus. He shared his methods, which were a significant departure from more complex, large-scale cultivation techniques. The PF Tek’s genius lies in its simplicity and reliance on readily available materials like mason jars, brown rice flour, and vermiculite. Over time, growers have tweaked and adapted the original method, but the core principles remain the same. It’s a testament to how accessible mycology can be when shared openly.
PF Tek vs. Monotub: Key Differences
While both PF Tek and monotubs are popular home cultivation methods, they differ quite a bit. PF Tek typically uses smaller, individual jars (often pint-sized) to create ‘cakes’. This means you have many small units to manage. Monotubs, on the other hand, are larger containers, often plastic storage bins, that hold a much larger volume of substrate. This allows for a single, large substrate block, which can lead to bigger yields per flush and potentially less work overall once set up. PF Tek is great for learning the basics and for smaller harvests, while monotubs are generally for those looking to scale up their production. Think of PF Tek as growing mushrooms in individual pots, and a monotub as a large garden bed.
Building Your Monotub For Success
Alright, let’s talk about building your monotub. This is where things start to get real in your mushroom growing journey. A monotub is basically a modified plastic storage container, and it’s a pretty popular choice because it makes growing mushrooms in bulk much simpler. The idea is to create a stable environment inside the tub – think consistent temperature and humidity – which is exactly what most mushrooms love. You can turn a regular plastic bin into a pretty sweet setup with just a few tweaks. It’s not complicated, even if you’re just starting out.
Choosing the Right Container Size
So, what size tub should you grab? Honestly, you can use pretty much any size, and the process will still work. But there are a couple of things to think about. Bigger tubs mean you can grow more mushrooms, which is great, but it’ll take a bit longer for everything to get colonized. Smaller tubs, on the other hand, will give you smaller harvests, but you might get your flushes faster. It really comes down to how much you want to grow versus how patient you are. For this guide, we’ll use a 55-60 liter tub as a reference, but feel free to adjust everything if you have a different size in mind.
Essential Equipment for Monotub Construction
Before you start cutting holes, let’s gather what you’ll need. You don’t need anything too fancy. Here’s a quick rundown:
- A plastic storage tub with a lid (55-60 liters is a good starting point)
- A marker pen
- A tape measure
- A drill with a 1.5-inch (38.1 mm) hole saw bit, or a sharp utility knife (like a Stanley knife)
- Micropore tape or poly-fill for the air holes
- Isopropyl alcohol for cleaning
- A large spoon or stirring stick (optional, for mixing substrate later)
Step-by-Step Monotub Assembly
Now for the actual building part. It’s pretty straightforward. The goal is to create small holes for air exchange while keeping the humidity locked in.
- Marking the Holes: Grab your tape measure and marker. You want to mark where your air holes will go. A common method is to measure about 12 cm up from the bottom of the tub. This puts the holes just above where your substrate level will likely be. You’ll want to divide the sides of the tub into thirds and place holes along those lines. Also, add a hole or two under the handles on the shorter sides, near the top.
- Creating the Holes: Carefully drill or cut out the holes you marked. If you’re using a drill with a hole saw, it’s pretty easy. If you’re using a knife, heat it up a bit to make cutting through the plastic smoother. Just be gentle; you don’t want to crack the tub. If you do get a small crack, don’t sweat it – a bit of tape or glue can fix it right up. You can find detailed instructions on how to prepare your monotub for cultivation.
- Covering the Holes: Once your holes are made, you need to cover them. This is where the micropore tape or poly-fill comes in. You’ll cover the holes with these materials. They let air in and out but keep contaminants from getting inside. This step is super important for controlling the environment inside your tub.
Preparing Your Substrate and Spawn
Getting your substrate and spawn ready is a big step in growing mushrooms at home. It’s where the magic really starts to happen, setting the stage for healthy mycelial growth. Think of it like preparing the soil for a garden; you want it just right.
Selecting the Ideal Substrate Mix
The substrate is basically the food and home for your mushrooms. For monotubs, a common and effective mix uses coco coir, vermiculite, and sometimes gypsum. Coco coir provides moisture retention, vermiculite adds aeration and holds water, and gypsum helps with pH balance and nutrient availability. Many growers also add things like coffee grounds or straw for extra nutrients, but start simple if you’re new to this. A good starting point is a 5:1:1 ratio of coco coir, vermiculite, and gypsum, but this can be adjusted based on the mushroom species you’re growing. The goal is a fluffy, moist, but not soggy, mixture.
Sterilization and Inoculation Best Practices
This is probably the most critical part to avoid contamination. You need to sterilize your substrate to kill off any competing bacteria or mold. A common method is the bucket tek, where you mix your substrate ingredients in a heat-resistant bucket, pour boiling water over it, seal the lid, and let it sit for several hours or overnight. This pasteurizes the substrate, killing off most unwanted organisms while leaving beneficial ones intact. For inoculation, you’ll use a spore or liquid culture syringe. Work in a clean area, ideally with a still air box or laminar flow hood. Sanitize your syringe needle with isopropyl alcohol or a flame (letting it cool!) before injecting the spores into your substrate. For a monotub, you’ll typically inoculate a grain spawn first, let that colonize, and then mix that colonized grain with your bulk substrate in the tub. This is a more advanced technique than the PF Tek, but it’s very effective for larger yields. If you’re using a spore syringe, remember that spores need time to germinate into mycelium, so be patient. Using a liquid culture can speed things up.
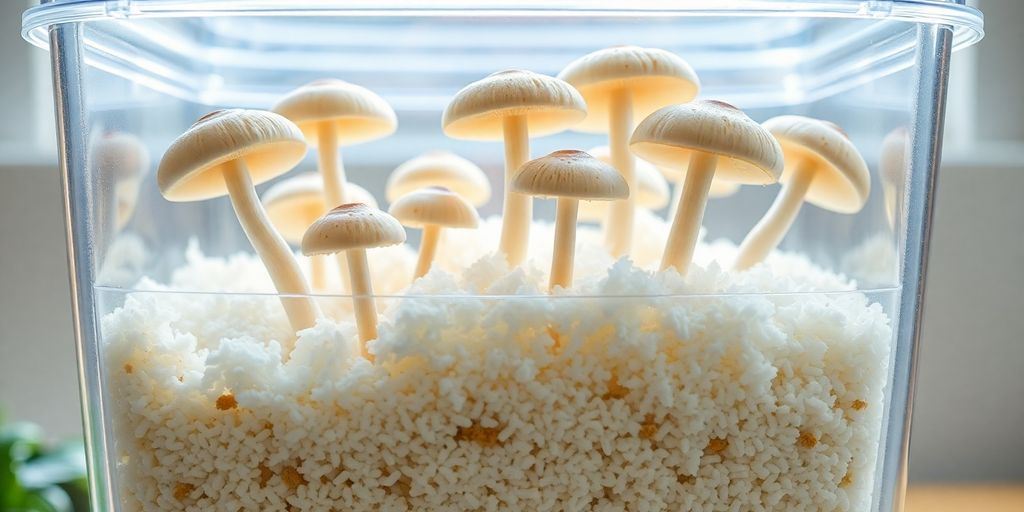
Understanding Spawn Colonization
Once you’ve inoculated your grain spawn, it needs time to colonize. This means the mycelium, the white, root-like structure of the fungus, will spread throughout the grain. You’ll want to keep the grain spawn in a dark place with temperatures typically between 70-75°F (21-24°C). You should see white mycelial growth spreading from the inoculation points. Full colonization of the grain spawn is indicated when the entire grain mass is covered in white mycelium. This can take anywhere from one to several weeks, depending on the mushroom species and the genetics of your culture. Once fully colonized, you’ll gently break up the grain spawn and mix it into your prepared bulk substrate within the monotub. This mixing process, often called ‘spawn run,’ is what introduces the mushroom mycelium to its new, larger food source.
Optimizing Conditions for Home Mushroom Cultivation
Alright, so you’ve got your substrate all prepped and colonized, and now it’s time to get those little guys to actually, you know, grow into mushrooms. This is where things get a bit more hands-on, but don’t worry, it’s not rocket science. It’s all about creating the right vibe for your fungi. Think of it like setting the perfect mood – not too hot, not too cold, and just the right amount of fresh air and moisture.
Maintaining Optimal Humidity Levels
Mushrooms are basically water bags, so keeping things humid is super important. If the air gets too dry, your mushrooms might just stop growing or, worse, abort altogether. You want to aim for a humidity level between 80-95%. A simple way to keep this consistent is by misting the inside of your monotub with a spray bottle a few times a day. Just a light misting, don’t go crazy and soak everything. Some folks use automated humidifiers connected to a controller, which is pretty neat if you want to set it and forget it. Just make sure the humidity doesn’t get too high, or you might invite some unwanted guests like mold.
Ensuring Proper Air Exchange
This is a big one. As your mycelium grows, it breathes, and it produces carbon dioxide (CO2). If that CO2 builds up, the mycelium gets a signal that it’s time to stop growing and start fruiting. To get actual mushrooms, you need to introduce fresh air, which has less CO2 and more oxygen. This tells the mycelium, ‘Hey, the party’s still going, keep growing!’ You can achieve this by fanning your monotub with the lid a couple of times a day, or by cutting small holes in the tub and covering them with micropore tape or polyfill. This allows for passive air exchange. For a more automated approach, you can even rig up a small computer fan on a timer. Getting this balance right is key to a good harvest.
The Role of Temperature and Light
Temperature is another factor you’ll want to keep an eye on. Most common mushroom species like to fruit in temperatures ranging from 70-75°F (21-24°C). It’s a good idea to know the specific temperature needs of the mushroom variety you’re growing, as some prefer it a bit cooler or warmer. You don’t need fancy equipment for this; a stable room temperature is often enough. As for light, mushrooms don’t need it to photosynthesize like plants do. However, they do need some light to know which way to grow and to develop properly. Indirect natural light from a window is usually perfect. If you don’t have a good window spot, a low-wattage LED or fluorescent light on a 12-hour timer works well too. Just avoid direct sunlight, as that can overheat your tub.
Keeping your grow environment stable is more important than hitting exact numbers. Fluctuations can stress the mycelium. Aim for consistency, and your mushrooms will thank you with a good yield.
Fruiting and Harvesting Your Yield
Initiating the Fruiting Stage
So, your spawn is all colonized and looking good. That’s a huge win! Now it’s time to get those little guys to actually grow mushrooms. This is called the fruiting stage. For PF Tek, this usually means taking your colonized cakes and getting them into a humid environment. Think of a ‘fruiting chamber’ – this could be a simple plastic tub with some damp perlite at the bottom, or even just the jars themselves if you’re careful. The main goal here is to keep things really moist, like 90-95% humidity. You’ll want to mist the inside of your chamber or the cakes directly a few times a day, and also give them some fresh air. Just crack the lid or fan it a bit. This fresh air exchange is super important for mushroom development. It’s a bit of a balancing act, keeping it humid but also letting in air. You can check out guides on fruiting chambers for more ideas on how to set this up.
Recognizing When Mushrooms Are Ready
This is where it gets exciting, but also where you need to pay attention. Mushrooms grow fast, like, really fast. You might wake up one morning and see a bunch of pins, and by the afternoon, they’re ready to go. The biggest clue is the veil. Most mushrooms have this thin layer of tissue under the cap, called a veil. When that veil starts to stretch and tear, it’s usually time to harvest. You might also notice the cap flattening out or even starting to curl upwards. Don’t wait too long, or the mushroom might drop spores, which looks like a dusty cloud and can sometimes make future flushes a bit less productive.
Harvesting Techniques for Maximum Yield
Harvesting is pretty straightforward, but doing it right helps your cakes produce more mushrooms later. First off, wash your hands really well or wear gloves. Cleanliness is key, even now. Find a mature mushroom, and gently grab the stem right at the base, close to the cake. Give it a little twist, like you’re unscrewing it, and pull gently. It should pop right off. If it’s stubborn, a clean knife or scissors can work, but try to cut as close to the cake as possible without damaging the mycelium underneath. You want to remove the whole mushroom, including the stem. After you pick them, check the cake for any little bits of stem left behind. These can rot and cause problems, so pick them out. Then, you’ll want to rehydrate your cakes for another round of growth. This usually involves dunking them in water for a few hours. It’s pretty cool how these cakes can keep producing!
Troubleshooting Common Cultivation Issues
Addressing Contamination Concerns
Contamination is probably the biggest headache for new mushroom growers. You’ve done everything right, your substrate looks perfect, and then BAM! Green fuzz or weird, slimy patches appear. Don’t panic. First, identify the contaminant. Common culprits include Trichoderma (green mold), Aspergillus (black or yellow mold), and various bacteria (often appearing as slimy, wet spots). The best defense is a good offense: meticulous sterile technique. Always work in a clean area, ideally a still air box or a laminar flow hood. Sterilize your tools, wear gloves, and use isopropyl alcohol liberally. If you spot contamination early, you might be able to cut out the affected area with a sterile knife, but often, it’s best to discard the entire tub to prevent spreading spores. Don’t be discouraged; even experienced growers deal with contamination sometimes. It’s a learning process.
Dealing with Slow or Stalled Colonization
Sometimes, your spawn just seems to sit there, not colonizing the substrate. This can be frustrating, but there are a few reasons why this might happen. One common cause is temperature. Mycelium likes it warm, but not too warm. If it’s too cold, growth slows way down. Aim for that sweet spot, usually between 70-75°F (21-24°C) for many common species. Too hot, and you risk killing the mycelium or encouraging bacterial growth. Another reason could be insufficient moisture in the substrate. Remember that field capacity we talked about? If the substrate is too dry, the mycelium has nothing to feed on. You can try gently misting the surface if it looks dry, but be careful not to overdo it. Also, check your inoculation rate. Using too little spawn can lead to slow colonization, giving contaminants a chance to take hold. If you’re using grain spawn, breaking up and redistributing the colonized grain after a week or two can help speed things up by giving the mycelium more points to grow from. It’s all about patience and observation.
Managing Environmental Fluctuations
Mushrooms are sensitive little things, and changes in their environment can really throw them off. The most common issue here is humidity. If your tub dries out, the mycelium can stall, and any developing pins (baby mushrooms) might abort. Maintaining consistent humidity is key, and this is where a good monotub design with proper air exchange comes in. You want enough FAE (fresh air exchange) to prevent CO2 buildup, but not so much that it dries everything out too quickly. Misting the walls of the tub, rather than directly on the substrate or pins, can help maintain humidity without causing damage. Temperature swings can also be a problem. Try to keep your grow area stable. Avoid placing your tub near drafty windows or direct heat sources. Consistent conditions lead to consistent growth. Remember, the goal is to mimic the natural environment where mushrooms thrive, which is typically moist and stable.
Ready to Grow Your Own?
So, you’ve learned about the PF Tek and the mighty monotub. It might seem like a lot at first, but really, it’s pretty straightforward once you get going. Both methods are solid ways to get a good harvest right in your own home. Don’t get discouraged if your first try isn’t perfect; everyone messes up a little when they start. Just keep at it, pay attention to the details, and you’ll be enjoying your homegrown mushrooms before you know it. Happy growing!
Frequently Asked Questions
What exactly is the PF Tek method?
The PF Tek, which stands for Psilocybe Fanaticus Technique, is a popular and easy way to grow mushrooms at home. It was created a while back and has become a favorite for many growers, especially those starting out. It’s known for being simple and effective, making it a great choice for beginners.
How is the PF Tek different from using a monotub?
While both PF Tek and monotubs are ways to grow mushrooms, they’re a bit different. PF Tek often uses smaller jars and is good for starting out. Monotubs are bigger containers that can hold more mushroom-growing material, leading to larger harvests. Think of PF Tek as a starter kit and monotubs as the next level up for bigger results.
What’s the best size container for a monotub?
For a monotub, you can use different sizes of plastic containers. Bigger tubs mean you can grow more mushrooms, but it might take a little longer for them to get ready. Smaller tubs give you mushrooms faster but in smaller amounts. It’s a trade-off between how much you want and how patient you can be.
What basic supplies do I need to build a monotub?
To build a basic monotub, you’ll need a plastic storage bin with a lid, a drill or something to make holes, some kind of filter material like Poly-Fil or micropore tape, and rubbing alcohol for cleaning. You’ll also need tools like a marker, tape measure, and a knife.
What are the most important things to control when growing mushrooms?
Mushrooms need the right conditions to grow well. This means keeping the humidity high, usually by misting the inside of the tub, and making sure there’s enough fresh air. They also need a steady temperature, not too hot or too cold, and some light, though not direct sunlight.
What should I do if my mushrooms aren’t growing or if I see mold?
If your mushrooms aren’t growing, it might just mean you need to be more patient; some types take a long time. Other issues could be contamination, which means unwanted mold or bacteria have gotten in. Making sure everything is super clean before you start is the best way to avoid this.