So, you’re thinking about getting into indoor growing, huh? Maybe you’ve heard about grow tents and how they can make things easier. Honestly, setting one up can seem a bit much at first, like trying to figure out a new IKEA furniture piece. You’ve got the tent itself, then all the gear like lights and fans, and you’re wondering how it all fits together. Don’t worry, though. We’re going to break down the whole grow tent setup and ventilation process, step by step, so you can get your plants happy and healthy without too much fuss. It’s not as complicated as it looks, really.
Key Takeaways
- Picking the right grow tent size is key – think about how many plants you want and how big they’ll get. Don’t cram them in!
- Good equipment matters. Invest in decent lights and fans; they’ll last longer and work better.
- Ventilation is super important. You need fresh air coming in and stale air going out to keep your plants from getting too hot or humid.
- Keep an eye on your temperature and humidity. Little gadgets called thermometers and hygrometers will be your best friends here.
- Watch out for common problems like overwatering or putting your lights too close. Your plants will tell you if something’s wrong.
Choosing Your Grow Tent Setup and Ventilation Essentials
Getting your grow tent set up right from the start is pretty important if you want happy, healthy plants. It’s not just about throwing a tent up in a corner; there’s a bit more to it. You need to think about the size, what gear you’re actually going to use, and where you’re going to put the whole setup.
Selecting the Appropriate Grow Tent Size
Choosing the right size tent is a big deal. Think about how many plants you plan to grow and how big they’ll get. A tiny tent for a bunch of big plants means they’ll be cramped, and airflow will be terrible. On the flip side, a massive tent for just one or two small plants might be overkill and harder to manage temperature-wise. For a couple of plants, a 2’x2′ or 3’x3′ might be fine. If you’re looking at maybe 4-9 plants, a 4’x4′ is often a good middle ground. Bigger setups, like 5’x5′, are for when you’re growing more or want to try out different strains at once.
Investing in Quality Grow Tent Equipment
Don’t skimp on your gear. Buying cheap lights or fans might seem like a good idea to save money upfront, but it can cost you later. Quality equipment usually lasts longer and works better, which means healthier plants and less hassle. Look into reputable brands for your lights, fans, filters, and even the tent itself. A good tent fabric, like 1680D, and reflective interior walls (aim for 95% or more) make a big difference in how efficiently your lights work.
Choosing the Right Location for Your Grow Tent
Where you put your tent matters. You need a spot that’s got enough space, is relatively stable in temperature and humidity, and has easy access to electricity. Basements can be good because they’re often cooler, but make sure there’s no risk of flooding. Bedrooms or spare rooms work too, but you’ll need to be more mindful of temperature fluctuations. The goal is to pick a place where you can more easily control the environment inside the tent.
It’s all about creating a stable little world for your plants. If the room your tent is in is already super hot or cold, you’re fighting an uphill battle from the start. Think about airflow in the room itself, too.
Assembling Your Grow Tent for Optimal Performance
Alright, so you’ve got your grow tent, and now it’s time to actually put it together. It might seem a little daunting at first, with all those poles and fabric, but honestly, it’s pretty straightforward if you just follow the steps. The goal here is to build a solid, light-proof space for your plants to thrive.
Assembling the Tent Frame and Fabric
First things first, you need to build the frame. Most tents come with these metal or plastic poles and connectors. Just match them up according to the instructions – usually, it’s pretty intuitive, like building with LEGOs but bigger. Make sure all the connections are snug. Once the frame is up and stable, it’s time for the fabric. Carefully drape the tent fabric over the frame. It’s designed to fit snugly, so you might need to wiggle it a bit. Secure it using the zippers and any Velcro straps or clips provided. Double-check that the fabric is pulled taut and there are no major wrinkles, especially around the corners, as this helps with light sealing. A well-assembled frame and fabric are key to a good grow environment.
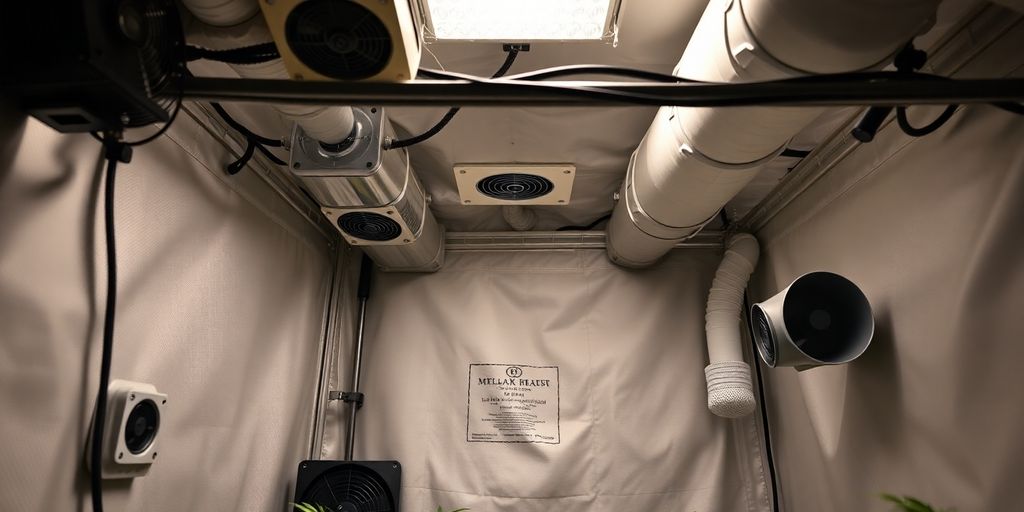
Installing Essential Vents and Ports
Now, let’s talk about getting air in and out. Your tent will have specific openings, usually called vents or ports. These are where your ducting for fans and filters will connect. Most tents have a few different sizes, often with flaps you can open or close. For a basic setup, you’ll typically want an intake vent near the bottom and an exhaust vent near the top. Make sure these are positioned correctly for your ventilation setup. If you’re using ducting, slide it over the port and secure it with a clamp. It’s important to seal these up well to prevent light leaks. You can find different sizes of grow tent ventilation components to match your needs.
Hanging Grow Lights and Ventilation Equipment
With the tent structure and basic ventilation in place, it’s time to hang your gear. Most tents have sturdy bars or straps built into the top. This is where your grow lights and exhaust fan will hang from. Follow the manufacturer’s instructions for your specific lights and fan. You’ll want to hang them securely so they don’t fall. It’s a good idea to have a way to adjust the height of your lights as your plants grow, so consider using adjustable hangers or carabiners. Proper placement is important for even light distribution and effective air circulation.
Remember to double-check all connections, both for the tent structure and any electrical equipment you’re installing. A little extra care now can save you a lot of headaches later. Make sure everything is secure and properly wired before you turn anything on.
Here’s a quick checklist for hanging equipment:
- Grow Lights: Hang them from the top support bars using adjustable hangers. Ensure they are centered over your growing area.
- Exhaust Fan: Mount this securely, usually near the top of the tent, and connect your ducting to it.
- Carbon Filter: If you’re using one, hang it alongside or above the fan, and connect it to the fan’s intake side with ducting.
- Circulation Fans: Place these strategically inside the tent to keep the air moving around your plants.
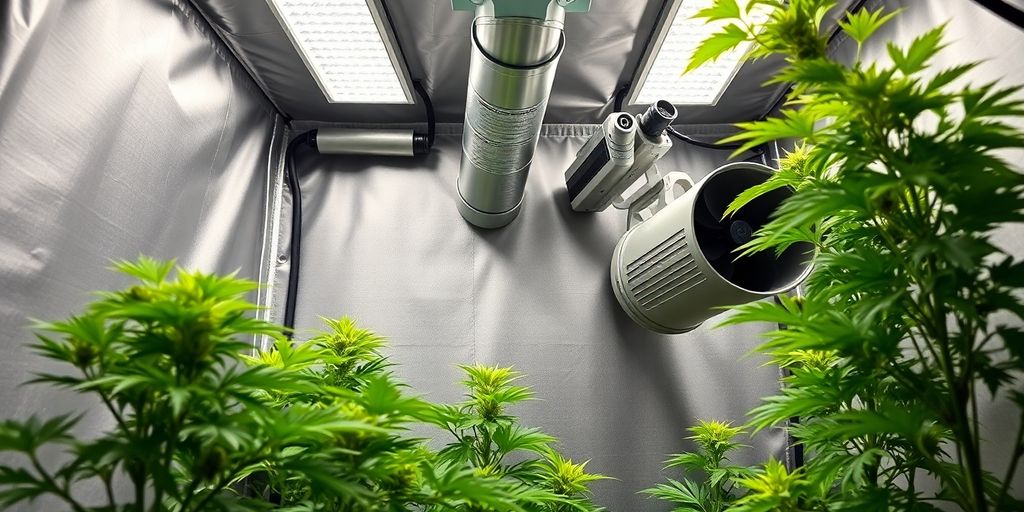
Implementing Effective Grow Tent Ventilation Strategies
Getting the air moving correctly inside your grow tent is super important. It’s not just about making sure your plants don’t get too hot, but also about giving them fresh air to breathe and getting rid of stale, humid air that can cause problems. Think of it like this: plants need to take in CO2 and release oxygen, and good ventilation helps this process along.
Understanding the Importance of Air Exchange
Plants need a constant supply of fresh air, specifically carbon dioxide (CO2), for photosynthesis. Without it, they just can’t grow properly. At the same time, they release oxygen and moisture. If you don’t have a good air exchange system, that moisture builds up, leading to high humidity. High humidity can be a breeding ground for mold and mildew, which is bad news for your plants. Proper air exchange removes this excess moisture and stale air, replacing it with fresh air. This also helps regulate the temperature inside the tent, preventing heat buildup from your lights.
Utilizing Exhaust and Intake Fans
To manage air exchange, you’ll typically use two types of fans: exhaust and intake. An exhaust fan is usually placed at the top of the tent, pulling the warm, moist air out. An intake fan, often placed at the bottom, brings fresh air in. Sometimes, you can get away with just an exhaust fan and passive intake vents, especially in smaller tents, but active intake fans provide more control. The size of the fan you need depends on the size of your tent and how many air changes per hour (ACH) you’re aiming for. A good rule of thumb is to aim for 30-60 ACH. You can calculate the fan size needed by multiplying the tent’s volume (length x width x height) by your desired ACH. For example, a 4x4x7 foot tent has a volume of 112 cubic feet. If you want 60 ACH, you’d need a fan rated for at least 6,720 cubic feet per hour (112 x 60). Many growers use inline fans for this job, which are designed to be connected to ducting for efficient airflow management. You can find a variety of inline fans for ventilation that will fit your needs.
Integrating Carbon Filters for Odor Control
If you’re growing plants that have a strong smell, a carbon filter is a must-have. This filter attaches to your exhaust fan and ducting. As the air is pulled out of the tent by the fan, it passes through the activated carbon, which traps odor molecules. This keeps your grow operation discreet and prevents any unwanted smells from escaping. It’s pretty effective stuff. You’ll want to make sure your carbon filter is rated for the same or higher cubic feet per minute (CFM) as your exhaust fan to avoid restricting airflow too much. Over time, the carbon will become saturated and need replacing, usually every 6-12 months depending on usage and the intensity of the odors.
Proper ventilation isn’t just about swapping air; it’s about creating a stable environment where your plants can thrive without the stress of extreme temperatures or humidity. It’s a foundational element for healthy growth and good yields.
Optimizing Your Grow Tent Environment
Alright, so you’ve got your tent set up, lights are hung, and the ventilation is humming along. Now comes the part where you really fine-tune things to make sure your plants are happy campers. It’s all about creating that perfect little microclimate inside your grow tent. Think of it like setting the thermostat and humidity just right for a cozy home, but for your plants.
Monitoring and Managing Temperature and Humidity
Keeping an eye on the temperature and humidity is super important. Too hot, and your plants can get stressed, maybe even wilt. Too humid, and you might invite mold or mildew, which is definitely not what we want. You’ll want to get yourself a good thermometer and hygrometer combo. These little gadgets tell you the temp and the relative humidity, usually in Celsius or Fahrenheit and percentage, respectively. Most plants like it somewhere between 70-85°F (21-29°C) during the day and a bit cooler at night, maybe 60-70°F (15-21°C). Humidity levels can vary, but a common range is 40-60%. You can adjust these by tweaking your fans, adding a humidifier or dehumidifier, or even just opening and closing vents a bit more. It’s a balancing act, for sure.
Setting Up Timers for Lighting and Equipment
Consistency is key for plants, especially when it comes to their light cycle. That’s where timers come in handy. You can get simple mechanical timers or more advanced digital ones. Plug your grow lights into a timer so they turn on and off automatically. Most plants need a specific amount of light and dark each day, and messing this up can really confuse them. You can also use timers for other equipment, like fans, to cycle them on and off if you’re not running them 24/7. This helps save energy and can also help manage your environment. Setting up a consistent schedule is one of the easiest ways to keep your plants thriving.
Testing and Adjusting Environmental Conditions
Don’t just set it and forget it. You’ve got to check your readings regularly. Maybe every day, or even a couple of times a day when you’re first getting things dialed in. See what the temperature and humidity are doing. Are they staying stable, or are they swinging wildly? If you notice things are off, you need to make adjustments. This might mean changing your fan speed, adjusting the timer on your exhaust fan, or even moving your lights up or down. It’s a process of observation and reaction. You’re basically learning your tent’s personality and how it responds to changes. Keeping good notes can help you figure out what works best for your specific setup and plants. For example, if your temperature spikes when the lights are on, you might need to improve your ventilation.
Remember, the goal is to create a stable and predictable environment. Plants don’t like big, sudden changes. Think about creating a consistent rhythm for your grow tent, just like you would for yourself. This stability will lead to healthier, happier plants and, hopefully, a better harvest.
Advanced Grow Tent Setup and Ventilation Techniques
Alright, so you’ve got the basics down, but let’s talk about really dialing things in. This is where you move from just growing plants to growing great plants. We’re talking about techniques that push your yields and plant health to the next level.
Plant Training Methods for Maximum Yields
Training your plants isn’t just about making them look cool; it’s about manipulating their growth to get the most out of your space and light. Think of it as guiding your plants to be more efficient.
- Low Stress Training (LST): This involves gently bending and tying down branches to create a more even canopy. The goal is to expose more bud sites to your grow lights, meaning more potential flowers.
- Screen of Green (SCROG): SCROG uses a trellis or net placed above your plants. As they grow, you tuck branches into the screen, forcing horizontal growth. This creates a dense, even canopy that maximizes light penetration.
- Topping and FIMing: Topping is cutting off the main growing tip, which encourages the plant to branch out. FIMing (short for “F***, I Missed!”) is similar but you cut off about 70-80% of the tip, often resulting in four or more new tops instead of just two. Both methods lead to bushier plants with more colas.
Optimizing Grow Light Distance
Getting your lights the right distance from your plants is a balancing act. Too close, and you risk burning them; too far, and they won’t get enough energy. Start with the manufacturer’s recommendation and observe your plants closely. Look for signs of stress like yellowing or bleaching on the leaves closest to the light. You might need to adjust the height as your plants grow taller or if you change your light intensity. It’s a good idea to learn how to hang grow lights properly for easy adjustments.
Managing Heat from Grow Lights
Even modern LED lights can generate heat, and in a confined space like a grow tent, this can quickly become an issue. While LEDs are much cooler than older HID lights, you still need to manage the heat they produce. Proper ventilation is your first line of defense, but sometimes you might need more. Consider using an environmental controller to automate your fans and keep things in check. You can also look into specific cooling solutions for your lights if heat is a persistent problem. Smart controllers can adjust fan speeds in response to temperature, optimizing conditions for plant growth.
Remember, consistency is key. Small, regular adjustments based on your plants’ needs will serve you much better than infrequent, drastic changes. Pay attention to the details, and your plants will thank you with a better harvest.
Common Grow Tent Setup and Ventilation Pitfalls
Even with the best intentions, growers can run into snags when setting up their grow tents. It’s not always smooth sailing, and sometimes the simplest mistakes can cause big problems for your plants. Let’s talk about some of the most common issues people face and how to steer clear of them.
Addressing Overwatering and Poor Drainage
This is a big one, seriously. People often think more water equals more growth, but that’s just not true. Overwatering suffocates the roots, preventing them from getting the oxygen they need. It’s a fast track to root rot and a very unhappy plant. Always check the soil moisture before you water. Stick your finger about an inch or two down; if it feels damp, hold off. Good drainage is just as important. Make sure your pots have plenty of holes and that your soil mix drains well. Nobody wants their plants sitting in a soggy mess.
Preventing Nutrient Burns and Deficiencies
Feeding your plants sounds straightforward, but it’s a balancing act. Too much fertilizer, and you’ll see those dreaded nutrient burns – usually brown tips on the leaves. Too little, and your plants will show signs of deficiency, like yellowing leaves or stunted growth. It’s best to start with a weaker solution than recommended, especially with seedlings, and gradually increase it as the plants grow. Pay attention to what your plants are telling you; they’ll usually show signs if something’s off with their food. Finding a good feeding schedule can make all the difference.
Avoiding Light Burn and Heat Stress
Lights are great, but they can also be a source of trouble if not managed correctly. Even modern LED lights can cause damage if they’re too close to your plants. You’ll see the leaves closest to the light start to look bleached or yellow. Heat stress is another issue, often linked to lights that run hot or poor ventilation. This can make your plants droop and slow their growth. Always keep an eye on the distance between your lights and the canopy, and make sure your ventilation system is keeping the temperature in check.
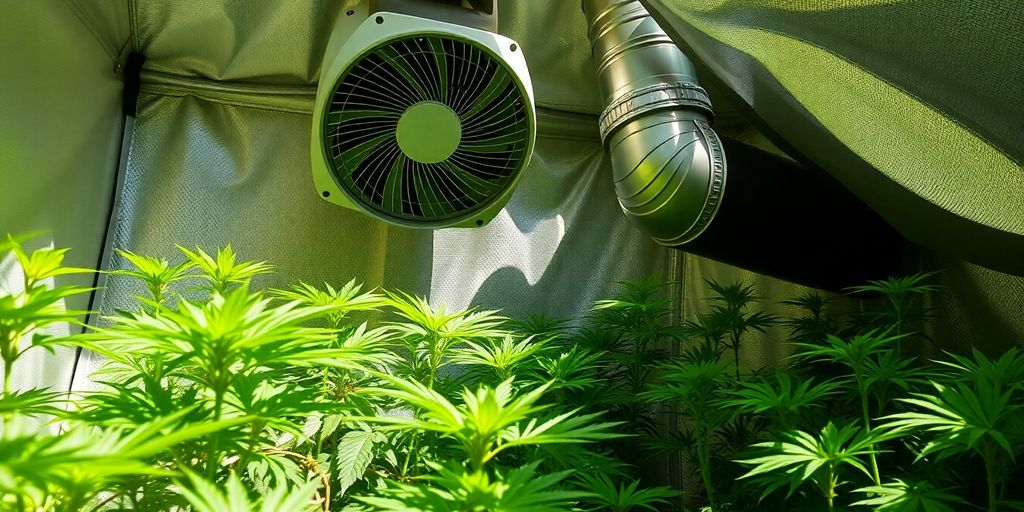
Ensuring Proper Air Circulation
Stagnant air inside a grow tent is a breeding ground for problems. It can lead to mold, mildew, and weak stems because the plants aren’t getting the gentle breeze they need to strengthen. You need air moving, but not so much that it’s blasting your plants – that’s called wind burn. A small oscillating fan inside the tent is usually enough to keep the air fresh and moving without causing damage. This helps with temperature and humidity control too, creating a healthier environment overall. Good airflow is key to preventing many common issues, so don’t skimp on it. You can find some helpful tips on airflow problems at airflow problems.
Wrapping It Up
So, you’ve learned a lot about getting your grow tent set up right and keeping the air moving. It might seem like a lot at first, with all the fans, filters, and making sure the temperature is just so. But honestly, once you get the hang of it, it’s pretty straightforward. Getting the ventilation dialed in is key to happy, healthy plants, and it really makes a difference in the long run. Don’t get discouraged if your first try isn’t perfect; it’s all part of the learning process. Keep tweaking things, pay attention to your plants, and you’ll be growing like a pro before you know it.
Frequently Asked Questions
How do I choose the best size for my grow tent?
Picking the right size grow tent is all about your plants and your space. Think about how many plants you want to grow and how big they’ll get. You also need to make sure there’s enough room for air to move around and for the lights to reach all your plants.
Why is it important to buy good quality equipment for my grow tent?
Good quality gear makes a big difference! Invest in decent grow lights, fans, and filters. Better equipment usually lasts longer and works more reliably, which means healthier plants and bigger harvests.
What’s the main reason for having good ventilation in a grow tent?
Think of ventilation like breathing for your plants. You need to swap out the old air for fresh air regularly. This helps control heat and moisture, keeping your plants happy and preventing problems like mold.
What tools do I need to monitor my grow tent’s environment?
You’ll need a thermometer and a hygrometer to keep an eye on the temperature and humidity. It’s like checking the weather for your plants! You might also want timers for your lights and fans to keep everything running on schedule.
Are there ways to train plants for better results, and how do I manage light height?
Yes, you can train your plants to grow in specific ways, like bending branches or using nets. This helps them grow bushier and get more light, which can lead to bigger yields. Also, make sure your grow lights aren’t too close, as this can scorch your plants.
What are some common problems I should watch out for with my grow tent setup?
Common issues include giving plants too much water, which can drown their roots, or feeding them too many nutrients, which can burn them. Also, watch out for plants getting too hot or not having enough air moving around them, as this can stress them out.