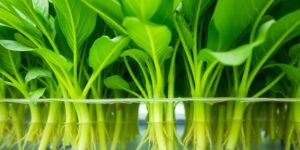
Growing your own microgreens is a pretty straightforward way to get some fresh greens, even if you don’t have a lot of space. Think of them as tiny, super-packed versions of regular vegetables. This microgreens growing guide will walk you through everything you need to know, from picking out seeds to getting them on your plate. It’s not complicated, and honestly, it’s kind of rewarding to watch them sprout up so fast. We’ll cover the basics, some common issues you might run into, and even suggest some popular types to try.
Key Takeaways
- Gather your supplies: You’ll need seeds, a growing medium like soil or a mat, trays, and water.
- Planting is simple: Spread your seeds evenly in the tray, mist them, and keep them moist.
- Provide light and air: Once they sprout, give them light and good air circulation to grow strong.
- Harvest time: Snip your microgreens with scissors when they have their first set of true leaves.
- Troubleshooting: Watch out for mold and address slow growth by checking light and moisture.
Essential Supplies For Your Microgreens Growing Guide
Getting started with microgreens is pretty straightforward, and you don’t need a whole lot of fancy equipment. Think of it like setting up a mini indoor garden. First off, you’ll need some seeds. You can use the same seeds that grow into full-sized veggies, but make sure they’re meant for sprouting or microgreens if you can find them. Avoid anything treated with chemicals; organic or certified naturally grown seeds are your best bet. Then there’s the growing medium, which is basically the soil. You want something light and airy, not heavy garden dirt. A good quality potting mix or a soilless seed-starting mix works great. Some people even use mats made of cotton or hemp, which can be a neat alternative.
Choosing The Right Seeds
Picking your seeds is half the fun! You can grow almost anything, from radishes and broccoli to basil and sunflowers. Some grow super fast, like mustard greens, while others, like cilantro, can be a bit slower. It’s good to start with a few different kinds to see what you like best. Just remember to look for seeds specifically labeled for microgreens or sprouting, and always check that they haven’t been treated with any pesticides or fungicides. Untreated, organic seeds are the way to go for healthy greens.
Selecting Your Growing Medium
Your microgreens need something to root into. While you can use soil, many growers prefer soilless mixes. These are often made from things like peat moss, coco coir (which is ground-up coconut husks), or perlite. These mixes are great because they hold moisture well but also drain nicely, preventing waterlogged roots. You can also find specialized microgreen growing mats made from natural fibers like hemp or cotton. These are super convenient because they don’t make a mess like soil can, and they provide a consistent base for your seeds. Just make sure whatever you choose is clean and free from contaminants.
Essential Tools For Success
Beyond seeds and soil, a few other items will make your microgreen journey much smoother. You’ll definitely need some shallow trays to grow your greens in. Many people use trays that are about 11×21 inches, but smaller ones work too. It’s helpful to have two sets of trays: one with drainage holes and one without. The tray with holes holds the soil and seeds, while the solid tray underneath catches excess water, allowing you to water from the bottom, which is a great way to keep the soil consistently moist without disturbing the delicate seedlings. A spray bottle is also handy for keeping the seeds moist, especially in the first few days. And when it’s time to harvest, a clean pair of sharp kitchen scissors or shears is a must. Some growers also like to use a small fan to keep air circulating, which helps prevent mold.
Don’t overthink it too much. The goal is to create a good environment for tiny plants to sprout and grow quickly. Cleanliness is key, and consistent moisture will make a big difference.
Planting Your Microgreens Seeds
Alright, so you’ve got your seeds, your trays, and your growing medium all sorted. Now comes the fun part: getting those little guys into the soil. It’s not super complicated, but a few things can make a big difference in how well your microgreens take off.
Preparing Your Trays
First things first, make sure your trays are clean. Seriously, this is important for avoiding any yucky mold later on. If you’re using new trays, they’re probably fine, but if you’re reusing them, give them a good wash. You want to fill your trays with your chosen growing medium, like a seed-starting mix. Don’t pack it down too much; just spread it evenly, aiming for about 2 to 3 inches of depth. They’re just babies, so they don’t need a ton of soil to get started. After you’ve got the soil in, it’s a good idea to give it a gentle watering. Some people like to water from the bottom by putting the tray in a shallow dish of water until the soil is moist. This helps keep the seeds from washing away when you water from the top later.
Sowing Seeds For Optimal Growth
This is where you actually put the seeds down. The amount of seeds you use really depends on the type of microgreen. Some, like radishes, you can sow pretty densely, while others, like sunflower or peas, need a bit more space. A good rule of thumb is to check the seed packet for specific instructions. If you’re growing a few different kinds, using little plant tags or even popsicle sticks to label each tray is a smart move so you don’t forget what’s what. Don’t be afraid to sow them a bit thicker than you might think. Once the seeds are down, give them a light misting. You want the soil to be damp, like a wrung-out sponge, but not waterlogged. Some growers like to cover the seeds with a very thin layer of soil or vermiculite, but many find just misting and covering the tray works just fine.
Maintaining Moisture Levels
Keeping the seeds moist is probably the most important thing during the germination phase. Once you’ve sown your seeds and given them a good misting, you’ll want to cover the tray. You can use another tray, a humidity dome, or even a piece of plastic wrap. This traps the moisture in and creates a nice, humid environment for the seeds to sprout. Check on them daily. If the soil looks like it’s starting to dry out, give it another gentle mist. You’re aiming for consistently damp soil, not soggy. Once you see those first little sprouts popping up, it’s time to remove the cover and give them some light. This usually happens within a few days, depending on the seed type.
Remember, the goal here is to create a mini-greenhouse effect for your seeds. This helps them absorb water and start the germination process without drying out. It’s a delicate balance, but once you get the hang of it, it becomes second nature.
Nurturing Your Microgreens
Once your seeds are sown and have had a chance to sprout, it’s time to focus on giving them what they need to grow strong. This stage is all about providing the right environment, and it’s not too complicated once you know what to look for.
Providing Adequate Light
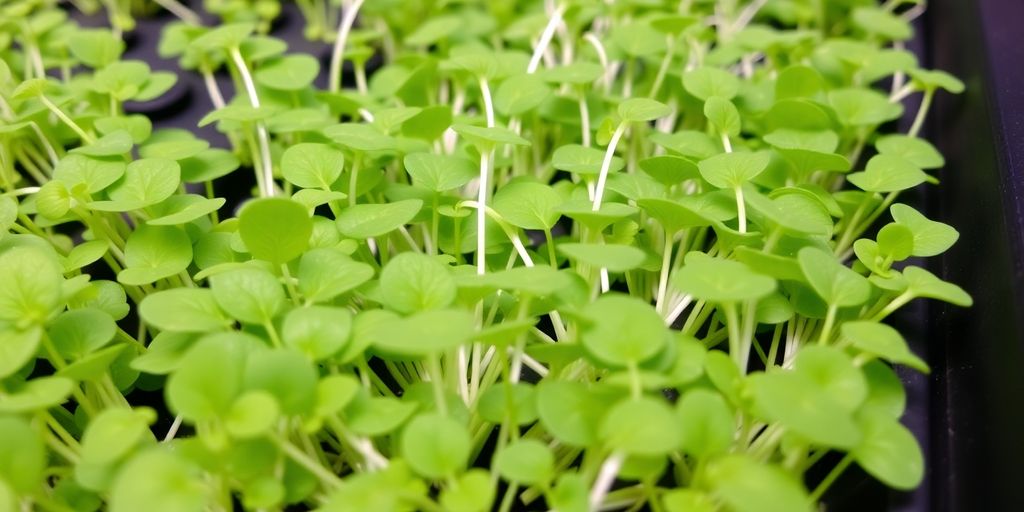
Bright light is key for healthy microgreens. Without enough light, your little plants will get leggy and weak, stretching out in search of sunshine. Indoors, this usually means you’ll need to supplement natural light, especially during those shorter, dimmer days. Think about using grow lights; full-spectrum lights work best. If you’re lucky enough to have a sunny window, a south-facing one is usually your best bet. You want to keep them under this bright light until harvest. Too little light and they’ll just look sad and pale.
Ensuring Proper Air Circulation
Good airflow is surprisingly important for microgreens. It helps prevent issues like mold and keeps the plants sturdy. If you’re growing in a smaller space, like a kitchen counter, a small fan set on low can make a big difference. Just don’t point it directly at the trays; you want a gentle circulation. Opening a window occasionally can also help refresh the air. This is especially helpful if you notice any excess moisture building up.
Understanding Germination Times
Different seeds sprout at different rates, which is good to know so you’re not worrying unnecessarily. Most microgreens will show signs of life within a few days to a week. For example, radish seeds tend to be pretty quick, often germinating in just 2-3 days. Others, like peas, might take a bit longer, especially if they need soaking beforehand. It’s helpful to keep a little note of what you planted and when, just so you can track their progress. Knowing these timelines helps you plan your harvests too. For a detailed look at specific seed types, you might find information on growing radish microgreens helpful.
Keeping your microgreens consistently moist but not waterlogged is the goal. Think of a wrung-out sponge. Overwatering is a common mistake that can lead to problems down the line, so always check the soil moisture before adding more water.
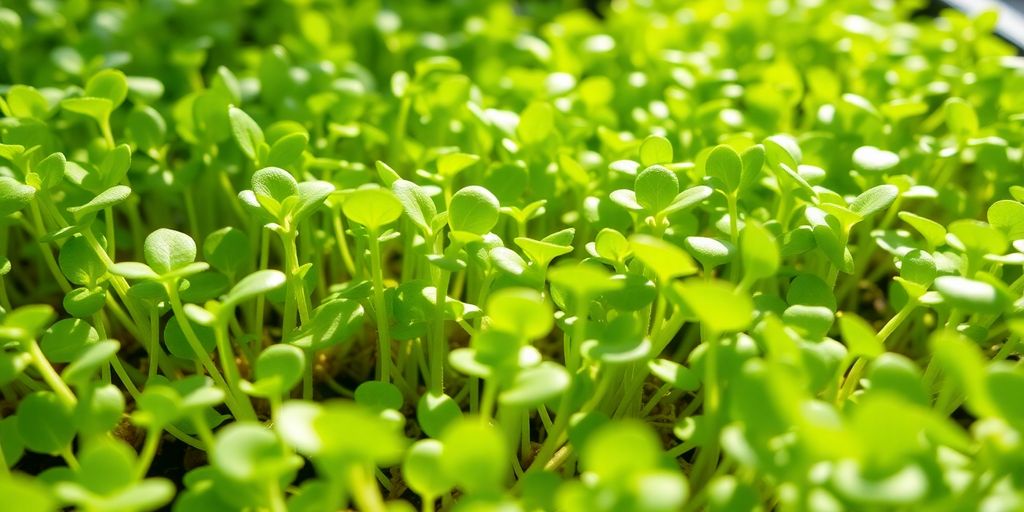
Harvesting Your Microgreens
So, you’ve nurtured your little greens, and now it’s time for the best part: the harvest! It’s pretty exciting to see those tiny plants you grew from seed ready to eat. Knowing the right time to harvest makes all the difference in flavor and nutrition. You don’t want to wait too long, or they can get a bit tough, but harvesting too early means you miss out on peak goodness.
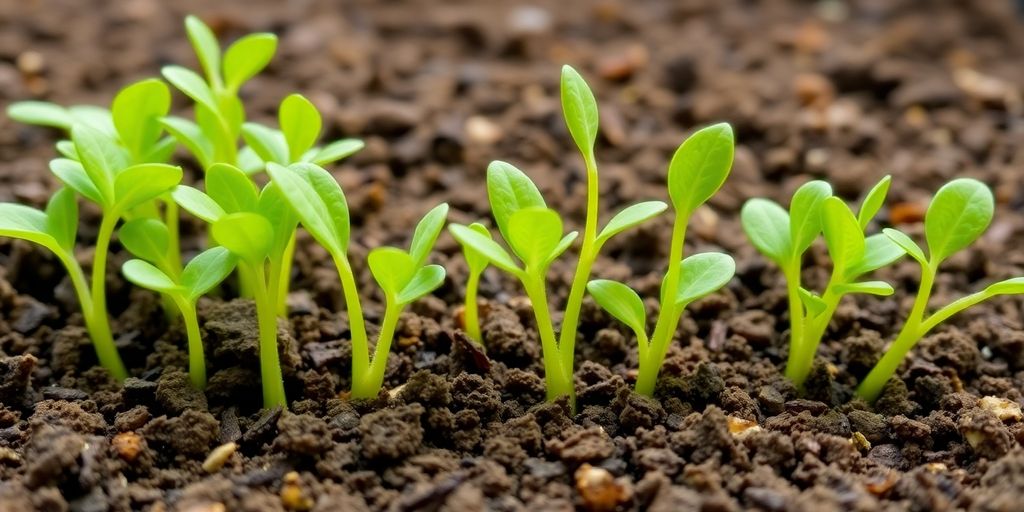
Knowing When To Harvest
Most microgreens are ready to go when they’ve developed their first set of true leaves, which are called cotyledons. These are the first two leaves that pop out after germination. You’ll see they’ve opened up and are usually a nice green color. This is typically about 7 to 14 days after you planted the seeds, depending on the variety. Some, like radishes or mustard greens, grow super fast, while others, like peas, might take a little longer. You can actually harvest them a bit earlier, right after the first leaves appear, but you’ll get the most bang for your buck nutritionally when those first leaves are fully open.
The Best Method For Harvesting
When it’s time to harvest, you have a couple of options. The most common way is to use a clean, sharp pair of kitchen scissors or a small knife. You want to cut the stems just above the soil line. This leaves the roots and the growing medium behind, which you can then compost. Another method, especially for greens like cilantro or parsley where you might want the whole plant, is to gently pull the entire microgreen, roots and all, from the soil. If you do this, make sure to rinse them really well to get all the soil off. Cutting is generally preferred as it keeps your harvest cleaner.
Post-Harvest Care
Once you’ve harvested your microgreens, it’s important to handle them gently. If you cut them, you can place them directly into a clean container or bag. If you pulled them up, give them a good rinse under cool water and pat them dry carefully with a paper towel or use a salad spinner. Washing them right before you eat them is best, as washing can shorten their shelf life. Store them in the refrigerator in a breathable container or a loosely sealed bag. They’re best eaten within a few days for that fresh-from-the-garden taste. And don’t forget to clean your trays thoroughly after harvesting to get them ready for your next batch!
Troubleshooting Common Microgreens Issues
Preventing Mold and Rot
Mold and rot are probably the most common headaches for microgreen growers. Usually, it’s a sign of too much moisture and not enough airflow. Keep your trays from sitting in standing water; always water from the bottom if you can, and let any excess drain away. If you notice condensation building up heavily on the inside of a humidity dome or cover, lift it off for a few hours to let things dry out a bit. Good air circulation is key, so avoid overcrowding your plants and maybe even use a small fan on a low setting for a few hours a day, especially in humid environments. If you see a little bit of fuzz, it’s often just root hairs, but if it looks like cobwebs or has a distinct color, it’s probably mold. Remove affected areas immediately and try to improve your airflow and watering habits. Cleaning your trays thoroughly between grows is also a big help in preventing future issues.
Addressing Slow or Uneven Growth
Sometimes your microgreens just don’t take off evenly, or they seem to be growing at a snail’s pace. This can be due to a few things. First, check your seed density. If seeds are too spread out, you’ll get sparse growth. Too dense, and they can compete too much for resources, leading to weak stems. A good starting point is to weigh your seeds for consistent planting, like around 10 grams for broccoli or 22 grams for radish per standard tray [76d3].
Another common culprit is light. Microgreens need plenty of bright light once they’ve germinated. If they’re stretching tall and looking pale, they’re probably not getting enough. Try moving them to a sunnier spot or supplementing with grow lights. Temperature also plays a role; most microgreens like it warm but not hot. Too cold, and they’ll slow down; too hot, and they might struggle. Lastly, make sure your growing medium is staying consistently moist but not waterlogged. Dry spells can really set back germination and growth.
Identifying Nutrient Deficiencies
Nutrient deficiencies in microgreens are less common, especially since you’re harvesting them so early. They get most of what they need from the seed itself. However, if you’re growing them for a longer period or notice unusual leaf discoloration (like yellowing between the veins, which could indicate iron deficiency, or pale overall growth), it might be an issue.
- Yellowing leaves: Could be lack of light, overwatering, or nutrient issues.
- Stunted growth: Often related to light, temperature, or water.
- Wilting: Usually a watering problem – either too much or too little.
If you suspect a nutrient problem, a very dilute, balanced liquid fertilizer specifically made for microgreens or edible plants can be used sparingly. Always follow the product instructions carefully, as over-fertilizing can be worse than not fertilizing at all. Remember, the goal is a quick harvest, so major nutrient issues are rare if you’re starting with good quality seeds and a decent growing medium.
Exploring Popular Microgreens Varieties
So, you’ve got the basics down and you’re ready to pick some seeds. It can be a bit overwhelming with so many options, right? Let’s break down some of the most popular choices to get you started.
Fast-Growing Options
If you’re eager to see results, some microgreens are super speedy. Radish and mustard greens are usually ready in about a week. They tend to have a bit of a peppery kick, which is nice. Arugula is another quick one, also with that zesty flavor. These are great if you’re just starting out or if you want a quick harvest for a salad.
Flavorful Choices
Not all microgreens taste like mild lettuce. Some really pack a punch! Cilantro microgreens, for example, are surprisingly good and don’t have that soapy taste some people get from the mature plant. Basil microgreens are also fantastic, adding a lovely aroma and taste to dishes. If you like a bit of spice, mustard greens or even some of the brassica family members like kale or broccoli can offer a nice peppery note. You can find a good variety of these popular microgreens to try.
Nutrient-Dense Selections
While most microgreens are packed with good stuff, some really stand out. Broccoli and kale microgreens are often highlighted for their high levels of vitamins and minerals. They have a pretty mild flavor, so you can add them to smoothies or other dishes without really noticing them, which is a neat trick for getting extra nutrition in. Even if you’re not a big salad eater, adding these to your meals is an easy way to boost your intake.
Remember that microgreens are essentially baby versions of vegetables, so they concentrate a lot of the nutrients found in the mature plant into a tiny package. This makes them a super-efficient way to get a lot of goodness into your diet.
Keep Growing!
So there you have it. Growing your own microgreens is pretty straightforward, right? You’ve learned about picking the right seeds, getting your soil ready, and giving them the light and water they need. It’s not complicated, and you can do it all year long. Plus, having these fresh greens on hand makes any meal better. Don’t be afraid to try different kinds, like sunflower or radish, and see what you like best. If you want to learn even more, check out our full guide. Happy growing, and enjoy your tasty, homegrown microgreens!
Frequently Asked Questions
What exactly are microgreens?
Microgreens are like baby salad greens. They’re harvested when they’re very young, usually after their first set of leaves, called cotyledons, have opened up. You can grow them indoors anytime, making them a great way to get fresh veggies all year long.
What supplies do I need to grow microgreens?
You’ll need a few things to get started: seeds (like broccoli, kale, or radish), a growing tray, and a good soil mix (avoid heavy garden soil). You’ll also need water, and maybe some scissors for harvesting. Some people like to use grow lights, especially in winter.
What kind of soil should I use for microgreens?
It’s best to use a potting mix, container mix, or a special seed-starting mix. These are lighter and better for microgreens than regular garden soil. Make sure your soil is evenly spread in the tray before planting the seeds.
What are some good types of microgreens to grow?
Most edible plants can be grown as microgreens! Popular choices include arugula, broccoli, kale, radish, and red cabbage because they grow fast and taste great. Sunflower microgreens are also a fun, larger option with a surprising flavor.
When can I harvest my microgreens?
Microgreens are usually ready to harvest about 1 to 3 weeks after you plant the seeds. You’ll know they’re ready when their first leaves have fully opened and turned green. You can cut them with clean scissors right above the soil.
How do I take care of my microgreens while they grow?
Keep the soil consistently moist, like a damp sponge, but not waterlogged. Misting them regularly helps. Once the seeds sprout, make sure they get plenty of light. If you’re growing them indoors, bright light from a window or a grow light is important to keep them from getting too tall and skinny.